Hey there, fellow coders and game lovers! I still remember the first time I played 2048—it was a dull afternoon at work, and I was desperate for something to shake off the boredom. I stumbled across this little tile-sliding game, and before I knew it, I was hooked, chasing that elusive 2048 tile like it was the holy grail. So today, I’m pumped to walk you through how to build your own version of 2048 in JavaScript. Whether you’re just starting out or you’ve been coding for years, this guide’s got your back. Let’s jump in!
You can grab the full source code on GitHub or try the live demo to see it in action. Ready? Let’s do this!

What is 2048?
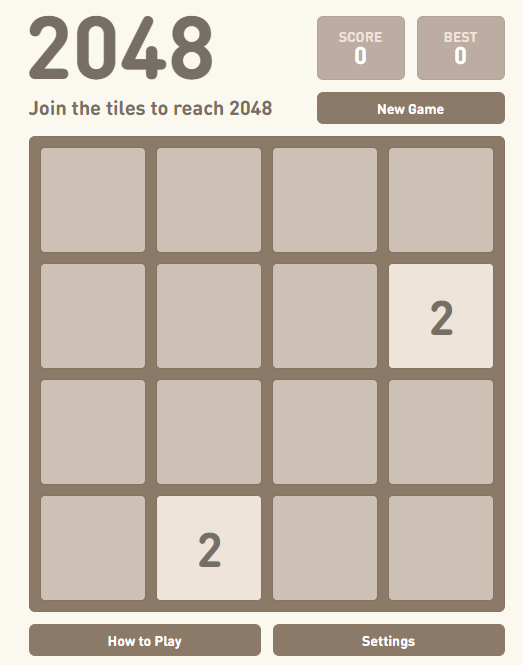
If you’ve never played 2048, picture this: a 4×4 grid filled with numbered tiles that you slide around with arrow keys or swipes. When two tiles with the same number crash into each other, they merge into one tile with double the value. The goal? Keep sliding and merging until you hit that magical 2048 tile. It sounds easy, but trust me, it’s sneaky-addictive. One minute you’re casually playing, and the next, you’re muttering, “Just one more move…”
Project Structure: What’s Inside?
Alright, let’s peek under the hood. This project’s got a few key files that work together like a well-oiled machine:
- index.html: The skeleton of the game—think of it as the foundation everything else builds on.
- css/game.css: Makes it all look pretty with tile colors, smooth animations, and a slick layout.
- js/game.js: The heart of the action, where the game logic lives.
- js/board.js: Handles the 4×4 grid and all those tile movements.
- js/tile.js: Defines how each tile behaves—like little puzzle pieces with personalities.
- js/jquery-1.11.3.js: A handy library to make DOM tinkering easier.
- js/jquery.touchSwipe.min.js: Adds swipe support for mobile players (because who doesn’t love a good swipe?).
Keeping things split up like this makes the code way less intimidating. You’ll thank me later when you’re debugging!
Step 1: Setting Up the HTML
Let’s kick things off with the HTML—it’s super simple but sets the stage for everything. Here’s what we’ve got:
- A title: “2048” (short and sweet)
- A “New Game” button to start fresh
- A score display to flex your progress
- A <figure> element with the class game—this is where the grid and tiles will pop up
- Some basic instructions and credits
Check out this snippet:
<div class="above-board">
  <h1>2048</h1>
  <div class="new-game"><button>New Game</button></div>
  <div class="score"><span>Score: 0</span></div>
</div>

<figure class="game"></figure>

<div class="below-board">
  <span>How to play: Use your keyboard’s arrow keys or swipe gestures to slide tiles...</span>
</div>
The <figure class=”game”> starts empty, but don’t worry—JavaScript’s about to swoop in and fill it with life. It’s like setting up a blank canvas before the real fun begins.
Step 2: Styling with CSS
Now, let’s talk looks. The game.css file is the unsung hero that makes this game pop. It handles:
- The 4×4 grid layout (gotta keep those tiles in line!)
- Tile colors that change based on their values (2 is one shade, 4 is another—you get the vibe)
- Smooth animations when tiles slide or merge (it’s so satisfying to watch)
I won’t bore you with the nitty-gritty CSS details—JavaScript’s the star of this show—but if you’re into styling, poke around game.css. It’s where the magic of tile colors and slick moves comes from.
Step 3: Initializing the Game
Time to get the game rolling! In game.js, the Game class is where it all starts. When the page loads, this little line fires up:
$(function () {
  new JSGame.Game($(".game"));
});
Here’s what the Game class does when it wakes up:
var Game = JSGame.Game = function($el) {
  this.$el = $el; // Grabs the <figure class="game"> container
  this.board = new JSGame.Board(); // Spawns a fresh board
  this.setupGrid(); // Builds the visual grid
  $(window).on("keydown", this.handleKeyPress.bind(this)); // Listens for arrow keys
  $el.on("swipeLeft", this.handleSwipeLeft.bind(this)); // Catches mobile swipes
  // ... other swipe directions
  $(".new-game").on("click", this.newGame.bind(this)); // Ties the “New Game” button to a reset
};
It’s like the game’s director, shouting, “Lights, camera, action!” It sets up the board, listens for your moves, and keeps everything humming along.
Step 4: Creating the Board
Over in board.js, the Board class is the brains behind the 4×4 grid. It’s a 2D array where tiles live—or don’t, if the spot’s empty. Here’s how it gets going:
var Board = JSGame.Board = function() {
  this.newEmptyGrid(); // whips up a blank 4x4 grid
  this.addStartingTiles(); // Drops in two random tiles to start
  this.score = 0;
  this.moved = false;
  this.won = false;
  this.lose = false;
};- newEmptyGrid(): Creates a fresh 4×4 array.
- addStartingTiles(): Tosses in two tiles (usually a 2 or 4) at random spots.
The board’s also in charge of moving tiles and figuring out if you’ve won or lost. It’s the puppet master pulling all the strings!
Step 5: Building the Tile Class
Tiles are the stars of 2048, and they get their own class in tile.js. Each tile knows:
- Where it is (like [0, 0] for the top-left corner)
- Its value (starting at 2 or 4)
- Some handy flags like merged and new to keep track of what’s up
Here’s the setup:
var Tile = JSGame.Tile = function(board, pos, value) {
  this.board = board;
  this.pos = pos || board.findEmpty(); // Picks a spot if none’s given
  this.value = value || this.assignStartingValue(); // 2 (80%) or 4 (20%)
  this.merged = false;
  this.new = true;
};
The assignStartingValue() method rolls the dice (well, kinda) to pick 2 (80% chance) or 4 (20% chance). It’s a small thrill every time a new tile pops up!
Step 6: Handling User Input
You’re the boss here, and the game listens to your every move—whether it’s arrow keys or swipes. The Game class maps keys to directions:
Game.KEYS = {
  38: "up",
  39: "right",
  40: "down",
  37: "left"
};

Game.prototype.handleKeyPress = function(event) {
  if (Game.KEYS[event.keyCode]) {
    event.preventDefault();
    var direction = Game.KEYS[event.keyCode];
    this.update(direction);
  }
};
For mobile folks, swipes work the same way:
Game.prototype.handleSwipeLeft = function(event) {
  this.update("left");
};
// ... other directions
The update() method tells the board, “Hey, the player moved—do your thing!”:
Game.prototype.update = function(direction) {
  this.board.handleInput(direction);
  if (this.board.moved) {
    this.board.placeRandomTile(); // Adds a new tile
    this.setScore(); // Updates your score
    this.board.moved = false;
    this.board.checkOver(); // Checks if you’ve won or lost
    if (this.board.won) this.win();
    else if (this.board.lose) this.lose();
  }
};
It’s all about turning your taps and swipes into tile-sliding goodness. Pretty cool, huh?
Step 7: Moving Tiles
Here’s where the real action happens—tile movement! The Board class has methods like left(), right(), up(), and down() to slide tiles around. Take left() for example:
Board.prototype.left = function() {
  for (var j = 1; j < 4; j++) {
    for (var i = 0; i < 4; i++) {
      if (this.grid[i][j].value) {
        this.grid[i][j].move([0, -1]); // Slide left
      }
    }
  }
};
The heavy lifting’s in the Tile class’s move() method:
Tile.prototype.move = function(direction) {
  var newPos = this.addDirection(direction);
  while (this.board.isOnBoard(newPos)) {
    if (this.board.isEmptySquare(newPos)) {
      this.board.clearSquare(this.pos);
      this.pos = newPos;
      this.board.moved = true;
    } else if (!this.merged && this.match(this.board.grid[newPos[0]][newPos[1]]) && !this.board.grid[newPos[0]][newPos[1]].merged) {
      var match = this.board.grid[newPos[0]][newPos[1]];
      this.mergeInto(match);
      this.board.moved = true;
    } else {
      break;
    }
    newPos = [newPos[0] + direction[0], newPos[1] + direction[1]];
  }
  this.new = false;
  this.resetKlass();
  this.board.addTile(this.pos, this);
  this.merged = false;
};
Here’s the breakdown:
- The tile slides in the direction you picked until it can’t.
- Empty spot? It moves there.
- Same-value tile that hasn’t merged yet? They combine, doubling the value and boosting your score.
- The merged flag stops tiles from merging more than once per move (a classic 2048 rule).
I’ll be real—I totally messed this up the first time. Tiles were merging like crazy, and my grid looked like a math explosion. Took me a few tries to get it right, but when it clicked, I felt like a coding rockstar. You’ll nail it too—I’ve got your back!
Step 8: Updating the Game State
After every move, the game’s got some housekeeping to do:
- If tiles moved (this.board.moved = true), a new tile pops up with placeRandomTile().
- Your score updates on-screen with setScore().
- The game checks if you’ve hit 2048 (win!) or run out of moves (lose!) with checkOver().
It’s like the game’s referee, keeping track of the action and tossing in a new tile to keep you on your toes.
Step 9: Rendering the Grid
The setupGrid() method in Game brings the grid to life visually:
Game.prototype.setupGrid = function() {
  var html = $("<div class='board'></div>");
  for (var i = 0; i < 4; i++) {
    for (var j = 0; j < 4; j++) {
      html.append("<div class='grid-square'></div>"); // The empty grid background
      var square = this.board.grid[i][j];
      if (square.value) {
        var tileDisplay = $("<div></div>");
        tileDisplay.addClass(square.klass()); // Adds position and value classes
        square.$el = tileDisplay;
        html.append(tileDisplay);
      }
    }
  }
  this.$el.html(html);
};
Each tile gets a <div> with classes like tile tile_0_0 value_2. CSS uses those to position them and trigger animations when they slide. Watching those tiles glide around is honestly half the fun!
Step 10: Win and Lose Conditions
- Win: Hit a 2048 tile during a merge, and this.board.won flips to true. A “You Win!” modal pops up to celebrate.
- Lose: Grid’s full and no moves left? this.board.lose turns true, and a “Game Over” message appears.
Both come with a “Play Again” button to jump back in. It’s the game’s way of giving you a high-five—or a gentle nudge to try again.
Step 11: Adding Mobile Support
Thanks to jquery.touchSwipe.min.js, swiping works like a charm on mobile. It catches your gestures and maps them to directions (e.g., swipe left → update(“left”)). Perfect for playing on the go—no keyboard required!
Conclusion: You’ve Got This!
There you go—a full rundown on building 2048 in JavaScript! We’ve covered the HTML setup, CSS styling, game initialization, board and tile logic, user input, tile movement, and win/lose states. It might feel like a lot, but once you start coding, it all falls into place—I promise.
Want to see it in action? Check out the source code on GitHub or play the live demo. Feeling creative? Tweak it! Add a crazy new tile or bump up the grid size. Whatever you do, I’d love to hear about it—drop a comment or share your masterpiece. Happy coding, and trust me, you’ve totally got this!